Keeping your Aadhaar details updated is essential in today’s digital world. Whether it’s a change in your name, mobile number, or email ID, incorrect information can lead to issues in banking, taxation, and government services. Fortunately, the Unique Identification Authority of India provides a simple online facility to update Aadhaar details from home.
Here’s a complete, easy-to-follow guide to help you update your Aadhaar information online without any hassle.
Why Updating Aadhaar Details Is ImportantYour Aadhaar card is one of the most widely used identity documents in India. It is linked to:
- Bank accounts
- Income tax filings
- Government schemes
- Mobile connections
Even a small mistake—like a misspelled name or outdated mobile number—can create problems. That’s why keeping your details accurate and updated is crucial.
What Details Can Be Updated Online?Through the UIDAI self-service portal, you can update:
- Name
- Address
- Date of birth
- Gender
- Mobile number
- Email ID
However, some updates may require verification or visiting an Aadhaar enrollment center if your registered mobile number is not active.
Important Requirement Before You StartTo update Aadhaar online, you must have:
✔ A mobile number already registered with your Aadhaar
✔ Access to that mobile for OTP verification
Without this, you will need to visit a nearby Aadhaar center.
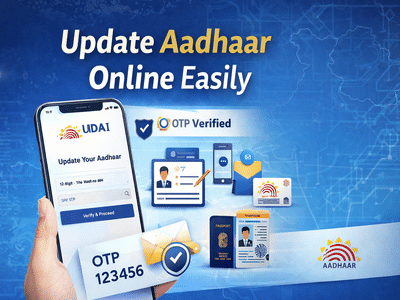
Step-by-Step Guide to Update Aadhaar OnlineFollow these steps carefully:
Step 1: Visit the Official UIDAI PortalGo to the official website of Unique Identification Authority of India.
Step 2: Enter Aadhaar NumberType your 12-digit Aadhaar number in the login section.
Step 3: Verify via OTPYou will receive a One-Time Password (OTP) on your registered mobile number. Enter it to proceed.
Aadhaar Data Update Request Step 4: Choose What You Want to UpdateSelect the field you want to modify (name, email, mobile, etc.).
Step 5: Fill Updated InformationEnter the correct details carefully.
Make sure spelling and format match your official documents.
Double-check all details before submitting your request.
Upload Supporting Documents (If Required)Depending on the type of update, you may need to upload documents:
For Name Change- Passport
- PAN Card
- Voter ID
- Driving License
- Birth certificate
- School certificate
- Passport
- Bank statement
- Passport
- Ration card
- Voter ID
👉 Note:
- Upload self-attested scanned copies
- Use separate documents for different updates
No documents are required for updating mobile number, email ID, or gender.
Final Submission and Tracking Step 7: Select BPO Service ProviderChoose the appropriate service provider option.
Step 8: Submit RequestAfter submission, you will receive an Update Request Number (URN).
Step 9: Track StatusUse the URN to track your update status online.
Important Points to Remember- Submitting a request does not guarantee instant update
- UIDAI verifies all details before approval
- Incorrect documents may lead to rejection
- Always keep your URN safe for tracking
You must visit an Aadhaar enrollment/update center if:
- Your registered mobile number is inactive
- Biometric updates are required
- Online update is not supported for your request
Updating your Aadhaar details online is quick, secure, and convenient. With the help of Unique Identification Authority of India, you can correct errors without standing in long queues.
Make sure your Aadhaar information is always accurate to avoid issues in financial transactions, government benefits, and identity verification processes.
-
Mom Refuses To Take Away Her Teen’s Phone As Punishment

-
One Therapy Session Can Make A Difference If the Mindset Is Right, Experts Weigh In

-
Is the distance with the partner increasing? If you give only 47 minutes a day, life will be filled with love!

-
Tarot Expert Predicts Bold Career Wins And Calls For Financial Discipline

-
How Many AA Batteries Does It Take To Power A PC? This YouTuber Found The Answer